👉 Let’s stay connected on social media!

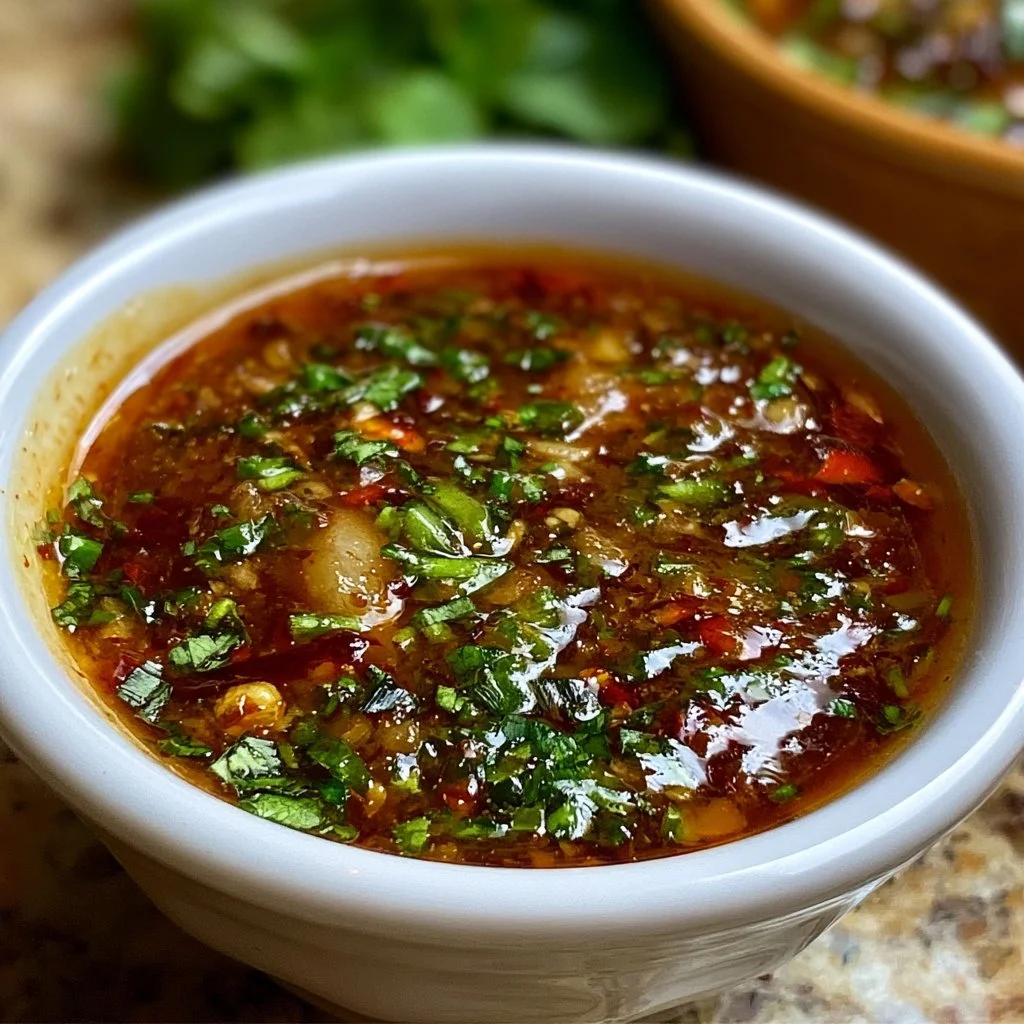
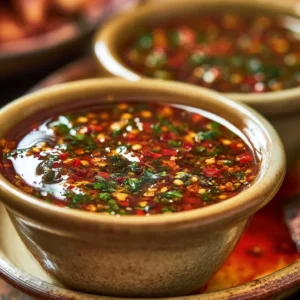
Crying Tiger Sauce: Your New Favorite Thai Dipping Delight

!
QUICK REMINDER:
While we have provided a jump to recipe button, please note that if you scroll straight to the recipe card, you may miss helpful details about ingredients, step-by-step tips, answers to common questions and helpful guidance to improve your results.
If you love bold Thai flavors, this Crying Tiger Sauce is about to become your new obsession, your NEW favorite Thai dipping delight, your go-to “put it on everything” sauce. Crying Tiger Sauce is tangy, spicy, salty-sweet, and honestly kind of addictive in that “wait, why am I still dipping?” sort of way. This crying tiger sauce comes together super fast, uses simple ingredients, and makes grilled meat, roasted veggies, and even meal-prep bowls taste like you ordered from your favorite Thai spot.
I first fell in love with Crying Tiger Sauce at a tiny strip-mall Thai restaurant here in Austin. I ordered grilled steak, they brought out this little dish of dark, spicy sauce, and I thought, “Oh, that’s cute.” Then I dipped. And dipped again. And then I basically ignored the steak and went after the sauce. You know that moment when a sauce just changes how you think about dinner? That was it.
Now I make some version of this almost every week. It’s fast, it’s flexible, and it makes simple food taste restaurant-level good. And the best part? You can totally tweak it to your heat level, your diet, your budget. Make it easy. Make it delicious. Make it yours. You can do this!
Why This Thai Dipping Sauce Belongs In Your Fridge
You are going to love this Crying Tiger Sauce for so many reasons, and honestly I keep repeating them because they’re THAT good. It’s wildly flavorful but made from pantry-ish ingredients, which means you can whip it up on a random Tuesday and feel like you made something fancy. It hits all the notes—spicy, sour, salty, a little sweet—so it wakes up grilled chicken, steak, tofu, veggies, even plain rice, and it keeps doing that every single time.
If you’re cooking for a spice-lover, this sauce is a total show-off, but if your kids (or you!) are milder, you can tone it down easily and it’s still wonderful, still special, still “wow what IS this?”. Meal preppers love it because it turns basic pre-cooked proteins into actual exciting lunches without extra work. If you’re watching sugar or sodium, it’s super easy to adjust; use less fish sauce, swap the brown sugar for honey or maple, thin it with a splash more water. And my vegetarian friends? Swap the fish sauce for soy sauce and you still get that deep umami punch.
It’s budget-friendly, too—most of the ingredients are inexpensive and last a long time, especially the fish sauce and chili flakes, so you’re getting restaurant-level flavor without paying restaurant prices. And the emotional payoff is big: it’s one of those recipes that makes you feel like, “Yes, I can actually cook amazing food at home,” which you absolutely can. You can do this, and you’re going to want to do it again and again.
What You Need To Make Crying Tiger Sauce
- ¼ cup lime juice (can substitute with lemon juice)
- 2 tablespoons fish sauce (can replace with soy sauce for vegetarian option)
- 2 tablespoons water (adjust for desired consistency)
- 1 tablespoon brown sugar (honey or maple syrup can be alternatives)
- 1 clove garlic, minced (can use garlic powder)
- 2 tablespoons lemongrass, minced (lemongrass paste as substitute)
- 1 tablespoon green onions, finely sliced (chives can be used)
- 1 tablespoon cilantro, chopped (basil can replace)
- 4 Thai red chili peppers (can substitute with jalapeños for milder heat)
- 1 teaspoon red pepper flakes (omit for milder sauce)
- 1 teaspoon toasted rice powder (optional, can replace with crushed peanuts)
Let’s talk about that lime juice first. It’s the bright, tangy backbone, so use fresh if you can, but bottled works in a pinch. Lemon juice gives a slightly softer acidity, still lovely and very workable. Fish sauce is what gives you that deep Thai restaurant flavor—salty, savory, a little funky in the best way—but if you’re vegetarian or just not into it, soy sauce totally steps in and still tastes amazing.
Lemongrass is the fun surprise ingredient. Fresh is fantastic, but I honestly use lemongrass paste from the tube most weeknights because it’s easy and it keeps forever in the fridge. Garlic, green onions, and cilantro bring that fresh, herbal hit; if your store is out, swap in chives or basil and you’re still winning. The Thai red chilies plus red pepper flakes are where the “crying” in Crying Tiger comes from—use fewer or sub jalapeños if you want more flavor than fire.
Toasted rice powder is optional but SO good for a little nutty, toasty depth. I usually grab it at the Asian market here in Austin, but you can also buy it online or just crush some roasted peanuts for a similar vibe. Cost tip: buy your fish sauce, chili flakes, and lemongrass at an Asian grocery if you have one—they’re usually cheaper and you get more. And please feel free to play. If you like sweeter, bump the sugar. If you like more tang, squeeze in extra lime. This sauce loves your personality.
How To Make Crying Tiger Sauce (Step-by-Step Overview)
Step-by-Step Instructions
First, mix your base. In a small bowl, add the lime juice, fish sauce, water, and brown sugar. Stir, stir, stir until the sugar is mostly dissolved—about 30 seconds. Taste it now. It should be tangy, salty, and lightly sweet. Too sharp? Add a pinch more sugar or a splash more water. Too salty? More lime or water. Don’t worry if it seems intense; once the herbs and chilies go in, it balances out.
Next, build the flavor. Add your minced garlic, lemongrass, green onions, and cilantro. Stir it together and let it sit for 2–3 minutes. This tiny “marinating” time helps the aromatics bloom and makes the sauce smell AMAZING. If you only have garlic powder or lemongrass paste, use them—no stress, the sauce will still be seriously good.
Now, bring the heat. Thinly slice your Thai red chilies (or jalapeños) and add them to the bowl, then sprinkle in the red pepper flakes. Start with less if you’re nervous; you can always add more. Give it another taste. Is it a gentle warm or a full-on fiery kick? Adjust to your comfort. If it somehow got too spicy, stir in extra water and a squeeze of lime, maybe an extra pinch of sugar. You didn’t ruin it; you’re just learning your perfect level.
Finally, finish with texture. Stir in the toasted rice powder or crushed peanuts, if using. This thickens the sauce just a touch and gives that gorgeous toasty note. If it’s thicker than you like, add a teaspoon or two of water until it’s pourable but still clingy enough to coat your food.
Let the sauce rest for at least 5–10 minutes before serving if you can. The flavors meld together and soften a bit, and it honestly tastes even better after 30 minutes. If the herbs darken slightly, that’s okay; the flavor is still bright. And if you look at it and think, “Did I mess this up?”—probably not. Give it a stir, taste again, adjust one small thing, and you’re back on track. You’re in charge here.
Little Secrets That Make This Sauce Even Better
For the best flavor, make the sauce 30 minutes before you plan to eat; those extra minutes turn it from “good” to “WOW this is SO good” because everything gets time to mingle. You can absolutely make it a day ahead for meal prep—just store it in a small jar in the fridge and give it a good stir before using. If it thickens or the flavors feel too strong the next day, splash in a bit of water or lime juice to wake it back up.
Leftovers keep well in the fridge for about 4–5 days. I don’t recommend reheating since it’s a fresh sauce; just serve it chilled or at room temp. If you want to batch cook, feel free to double or triple the recipe. I do this for parties and for weekly meal prep bowls and it disappears every time. For kids or spice-sensitive folks, cut the chilies in half or leave out the red pepper flakes entirely; you’ll still get amazing flavor without the tears.
Think of this as a flexible template, not a strict rulebook. You’re allowed to tweak the sweetness, the tang, the salt—this is me putting my teacher hat back on and reminding you there is no sauce police. Taste, adjust, and trust yourself. You really can do this, and you’re going to be proud when you nail your own “house version” of Crying Tiger.
How To Serve Crying Tiger Sauce (So Many Ways!)
Traditionally, Crying Tiger Sauce is served with grilled beef, but oh my goodness, it loves grilled chicken, shrimp, tofu, and roasted vegetables just as much. I pour it over sliced steak, set it in a little dish on the side, and let everyone dunk to their heart’s content. For a super simple dinner, I toss some sauce over jasmine rice with leftover chicken and cucumber slices—instant flavor bomb bowl.
It’s amazing as a dip for fresh veggies (carrots,
Crying Tiger Sauce
Crying Tiger Sauce is a bold and addictive Thai dipping sauce that’s tangy, spicy, and salty-sweet, perfect for enhancing grilled meats, roasted vegetables, and meal-prep bowls.
Ingredients
Base Ingredients
- 1/4 cup lime juice can substitute with lemon juice
- 2 tablespoons fish sauce can replace with soy sauce for vegetarian option
- 2 tablespoons water adjust for desired consistency
- 1 tablespoon brown sugar honey or maple syrup can be alternatives
Aromatic Ingredients
- 1 clove garlic, minced can use garlic powder
- 2 tablespoons lemongrass, minced lemongrass paste as substitute
- 1 tablespoon green onions, finely sliced chives can be used
- 1 tablespoon cilantro, chopped basil can replace
Heat Ingredients
- 4 pieces Thai red chili peppers can substitute with jalapeños for milder heat
- 1 teaspoon red pepper flakes omit for milder sauce
- 1 teaspoon toasted rice powder optional, can replace with crushed peanuts
Instructions
Preparation
- In a small bowl, add the lime juice, fish sauce, water, and brown sugar. Stir until the sugar is mostly dissolved—about 30 seconds.
- Taste it now. Adjust with more sugar or lime to balance flavors.
Building Flavor
- Add minced garlic, lemongrass, green onions, and cilantro. Stir together and let sit for 2-3 minutes to let the flavors bloom.
Adding Heat
- Thinly slice the Thai red chilies and add them to the bowl along with red pepper flakes. Adjust the heat level according to your preference.
Finishing Touch
- Stir in the toasted rice powder or crushed peanuts. Adjust thickness with extra water if necessary.
- Let the sauce rest for at least 5-10 minutes before serving for flavors to meld.
Notes
For the best flavor, make the sauce 30 minutes before serving. Leftovers can be stored in the fridge for 4-5 days. Perfect for dipping grilled meats or drizzling over rice and veggies.