👉 Let’s stay connected on social media!

Indulgent Caramel Crush Bars That Will Wow Your Taste Buds
!
QUICK REMINDER:
While we have provided a jump to recipe button, please note that if you scroll straight to the recipe card, you may miss helpful details about ingredients, step-by-step tips, answers to common questions and helpful guidance to improve your results.
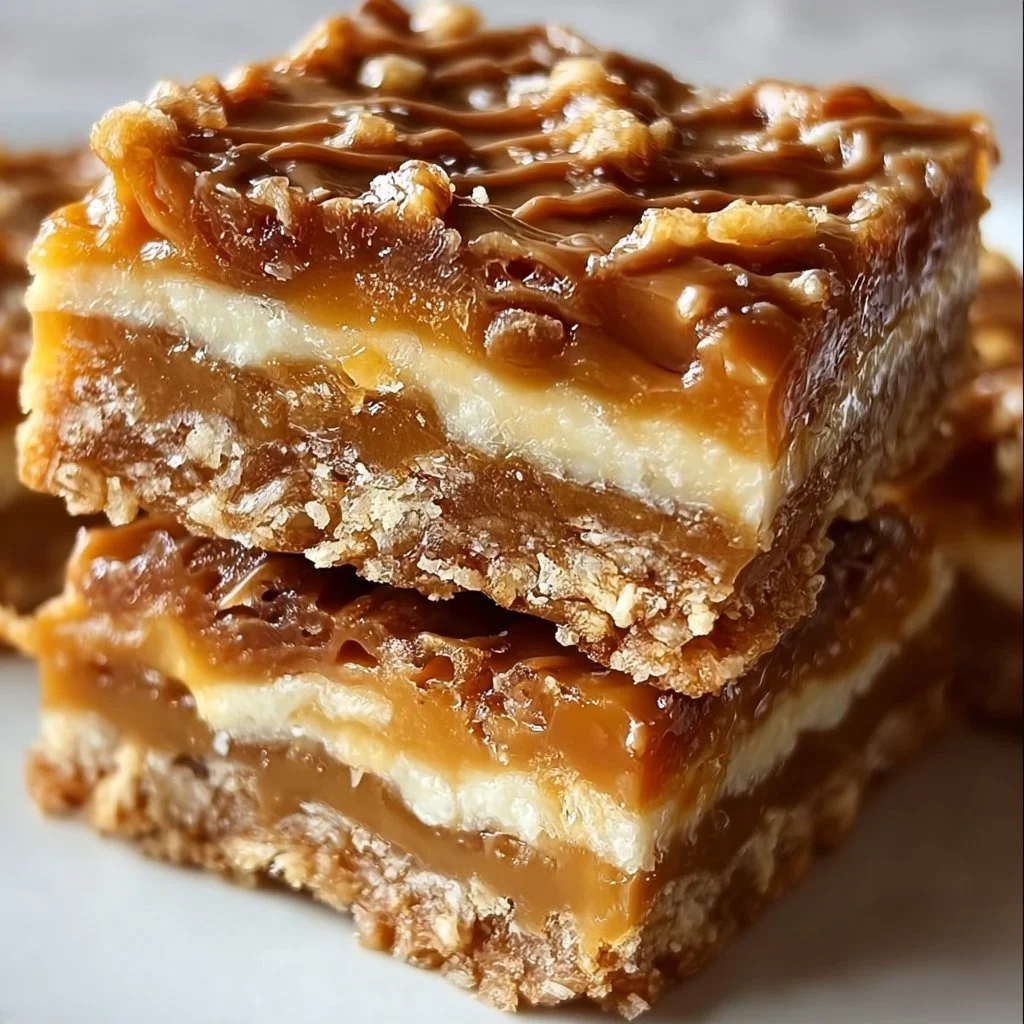
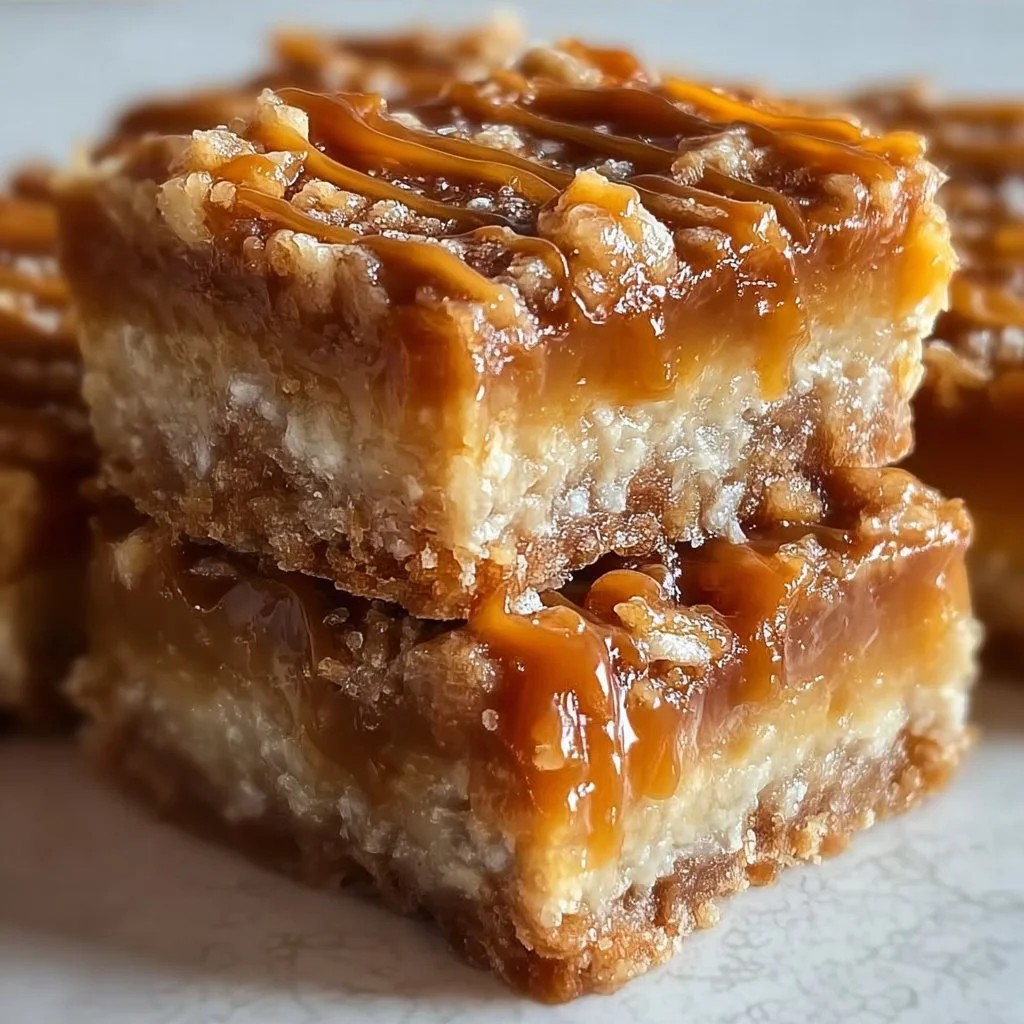
Indulgent Caramel Crush Bars are the dessert bar recipe you make once and then crave forever, and these Indulgent Caramel Crush Bars really do WOW your taste buds with that buttery oat base and thick, dreamy caramel layer, and yes, I’m saying Indulgent Caramel Crush Bars three times because they are THAT good. They’re rich but not fussy, sweet but with a cozy oat chew, and they bake up into the kind of treat that looks like it came from a bakery case. They freeze well, travel well, and make your kitchen smell like an actual candy shop.
I stumbled into this recipe after a not-so-glorious fail with some dry cookie bars one summer here in Austin. I wanted something that felt like a mash-up of oatmeal cookies and caramel sauce but simple enough for a weeknight. After a few batches (okay, five), this version finally hit that magical spot: buttery crust, thick caramel, soft bite, and a little crunch on top. You know that dessert you bring to a potluck and people hover around the pan pretending they’re “just evening out the edges”? That’s these.
They use pantry staples, no fancy equipment, and the whole thing comes together in under an hour, with lots of hands-off time. Easy for meal preppers, fun for kid helpers, and honestly a little dangerous because they are so insanely snackable. But we’re here for joy, not guilt, right?
Why These Caramel Bars Will Totally Steal Your Heart
You know those recipes that are both cozy and over-the-top at the same time? That’s what these bars do. They’re indulgent without being complicated, which is my favorite combo, always. The buttery oat crust feels like a warm hug, and the thick caramel layer on top is just outrageously good, like “lick the spoon and then the pot” good. If you’re baking for family, these are kid-approved, spouse-approved, neighbor-approved; honestly, they’re just wildly popular every single time.
Meal preppers will love that you can slice them, freeze them, and pull out a bar when that 3 p.m. sweet craving hits hard. If you’re trying to cut back a bit, you can make them smaller, share them, or pair with fruit, and boom, they still feel special but a tiny bit more balanced. They work for birthday parties, bake sales, after-school treats, or that “I just need a bite of something sweet after dinner” moment. I’m repeating myself here on purpose: they are EASY, they are DELICIOUS, and they are YOURS to customize. And if baking usually intimidate you a little? Stay with me. You can do this, truly.
Ingredients You’ll Need (and How to Make Them Yours)
1 1/4 cups Butter (melted)
1 1/2 cups Quick oats
2 1/4 cups All-purpose flour
1 1/2 cups Brown sugar
1/4 cup Butter (melted)
1 cup Brown sugar
1/4 cup Milk
2 teaspoons Vanilla extract
2 tablespoons Flour
The star here is butter plus brown sugar — that duo gives you the deep, almost toffee-like flavor that makes these bars feel bakery-level. Quick oats add that tender chew and a little extra fiber (we’re counting it, okay?), and plain all-purpose flour keeps everything sturdy enough to slice cleanly.
For the milk, you can use dairy or your favorite unsweetened plant milk; oat milk or almond milk both work surprisingly well. If you’d like to nudge them a bit lighter, swap part of the butter in the crust with coconut oil, or use half whole-wheat pastry flour and half all-purpose for a little whole-grain action.
I usually grab my ingredients at H‑E‑B or Target here in Austin — nothing boutique or specialty required. Store-brand butter and sugar are totally fine; save the fancy stuff for when you really want to. If you’re baking on a budget, buy brown sugar and oats in bulk; they last forever and you’ll end up paying much less per batch. And please feel free to play: add a pinch of flaky sea salt on top, stir in a handful of chopped nuts, or swirl in a tiny bit of peanut butter into the caramel for a twist.
Step-by-Step: From Simple Pantry Stuff to Caramel Magic
We’re keeping the process totally doable, even if you’re juggling kids, work, and a podcast in the background.
First, preheat your oven to 350°F (175°C) and line a 9×13-inch pan with parchment or lightly grease it. This takes 5 minutes but saves you from sticky-pan heartbreak later. Next, make the oat crust: in a large bowl, stir together 1 1/4 cups melted butter, 1 1/2 cups quick oats, 2 1/4 cups flour, and 1 1/2 cups brown sugar. The mixture should look a bit crumbly but hold together when you press it. If it feels too dry, don’t panic — just drizzle in an extra tablespoon or two of melted butter or milk. Press about two-thirds of this crust mixture firmly into the pan. Press it all the way into the corners so the caramel has a little “wall” to sit in.
Bake that base for about 10–12 minutes, just until it’s lightly set and barely golden at the edges. It won’t look fully done yet, and that’s okay. While it bakes, we make the caramel layer.
In a saucepan over medium heat, combine 1/4 cup melted butter, 1 cup brown sugar, 1/4 cup milk, 2 tablespoons flour, and 2 teaspoons vanilla extract. Whisk gently and watch closely — within about 4–6 minutes it will go from grainy to glossy and just start to bubble. Once it’s smooth and thickened slightly, remove from heat. If it looks a little lumpy at first, just keep whisking; it almost always comes together. Don’t worry if it seems a bit thin; it thickens more in the oven.
Carefully pour this warm caramel over your pre-baked crust, spreading it close to the edges. Sprinkle the remaining oat mixture evenly over the top — some little clumps, some crumbs, that rustic look is perfect. Pop the pan back into the oven for another 18–22 minutes. You’re looking for bubbling edges and a lightly toasty top. If the top seems too pale after 18 minutes, give it a few more, but don’t overthink it.
Now the hardest part: let them cool. For clean squares, cool at room temp for at least 1–2 hours, or chill in the fridge for faster setting. If you cut too early and they ooze a bit? It’s fine. They’ll still taste AMAZING, just a little messy, which in my book is not a bad problem.
Smart Little Tricks to Make These Bars Even Better
You can make the crust mixture a day ahead and keep it covered in the fridge; just bring it slightly toward room temp before pressing into the pan. For busy weeks, bake the bars on Sunday, cool, slice, and store in an airtight container — they keep on the counter 2–3 days, or in the fridge up to a week. They also freeze like a dream: layer slices with parchment and freeze up to two months, then let them thaw on the counter or give them 10–15 seconds in the microwave.
If you like them warm and gooey, microwave a bar for a few seconds and serve with a spoon. For kids, you can cut them into tiny squares or fingers, even use them as a little lunchbox treat now and then. The caramel softens at room temp, so if you’re transporting to a party, keep them chilled until you’re ready to serve. Think of this like your “bake once, enjoy all week” situation — teacher voice here: plan ahead and Future You will be VERY happy.
How to Serve and Share These Gorgeous Bars
These bars are fabulous just as they are, but pairing them is where the fun begins. I love serving them slightly chilled with hot coffee or tea so you get that contrast of cool, sweet bar and warm drink. For a full-on dessert moment, add a scoop of vanilla or caramel ice cream on top and a pinch of flaky salt — it’s dramatic in the best way but took you basically no extra effort.
They’re perfect for potlucks, holiday dessert tables, bake sales, or “I forgot I signed up to bring something to the school event” emergencies. Cut them into small bites for a dessert board alongside berries and dark chocolate chunks. Leftovers (if that miracle happens) can be crumbled over yogurt or vanilla ice cream, or layered into a parfait jar with fruit for a quick “fancy-feeling” snack. I serve them most often on a simple white plate, nothing fancy, because the shiny caramel top and crumbly edges do all the talking. Are you seeing it? You’re absolutely going to want to show these off.
Common Questions About Caramel Crush Bars
Yes, you can, but give them a quick pulse in a blender or food processor so they’re closer to quick oats. Whole rolled oats can make the crust a bit more rustic and crumbly, which some people love, but if you want that cohesive, chewy bite, slightly smaller pieces work best.
They don’t have to be, but I recommend it if you live somewhere warm (hello, Texas). The caramel stays firmer and the bars slice more cleanly. For a softer texture, let them sit at room temp for 10–15 minutes before serving.
You can, but do it gently. Try reducing the brown sugar in the crust by 1/4 cup the first time, and maybe 2–3 tablespoons less in the caramel layer. Keep in mind, sugar affects texture as well as sweetness, so if you cut too much, they might be more dry or not quite as gooey.
Use a smaller pan, like 8×11 or even 8×8, but increase the bake time slightly. Start checking the second bake at around 22 minutes and go from there. Thicker bars are extra rich, so you might want to cut them into smaller squares.
Totally. This recipe is super forgiving. Stir 1/2 to 3/4 cup chopped pecans, walnuts, or chocolate chips into the crust mixture before pressing it in. Just avoid adding too many wet ingredients, so your bars still set nicely.
These bars really are that magical combo of easy and over-the-top delicious, and every time I bake a pan I’m reminded how surprisingly simple they are. If you try these Indulgent Caramel Crush Bars, let me know how they turned out for you — did you tweak anything, did your kids devour them, did someone ask for the recipe twice?
Tag me if you share a photo on Instagram or Pinterest so I can cheer you on from my little Austin kitchen. You’ve got this, and I genuinely can’t wait to see your caramel-splashed pans cooling on the counter…

Indulgent Caramel Crush Bars
These Indulgent Caramel Crush Bars feature a buttery oat base and a thick, dreamy caramel layer, making them an irresistible treat that is easy to make and perfect for any occasion.
Ingredients
For the oat crust
- 1 1/4 cups melted Butter Add extra if mixture feels too dry.
- 1 1/2 cups Quick oats
- 2 1/4 cups All-purpose flour
- 1 1/2 cups Brown sugar Used in the crust.
For the caramel layer
- 1/4 cup melted Butter
- 1 cup Brown sugar Used in the caramel.
- 1/4 cup Milk Use dairy or unsweetened plant milk.
- 2 teaspoons Vanilla extract
- 2 tablespoons Flour Thickens the caramel.
Instructions
Preparation
- Preheat your oven to 350°F (175°C) and line a 9×13-inch pan with parchment or lightly grease it.
- In a large bowl, stir together 1 1/4 cups melted butter, 1 1/2 cups quick oats, 2 1/4 cups flour, and 1 1/2 cups brown sugar. Press about two-thirds of this mixture firmly into the pan.
- Bake the base for 10–12 minutes, until lightly set.
Make the caramel
- In a saucepan over medium heat, combine 1/4 cup melted butter, 1 cup brown sugar, 1/4 cup milk, 2 tablespoons flour, and 2 teaspoons vanilla extract. Whisk until smooth and slightly thickened (about 4-6 minutes).
- Pour the caramel over the baked crust and spread it close to the edges. Sprinkle the remaining oat mixture on top.
Baking
- Bake for another 18-22 minutes until bubbling at the edges and lightly toasty on top.
Cooling
- Allow to cool at room temperature for at least 1-2 hours before slicing.
Notes
These bars can be sliced, frozen, and stored in an airtight container for later. They also reheat well. Customize by adding nuts, chocolate chips, or a sprinkle of flaky sea salt on top.